Getting Started with PIDVision.AI
Follow these steps to import your P&ID PDF, configure the AI model, and generate your instrument data.
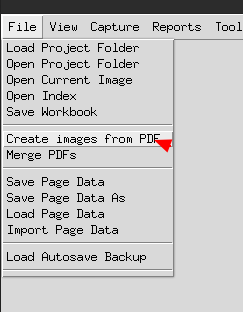
01
Convert PDF to Images
Open the File menu and click Create images from PDF. This converts your P&ID PDF into high-resolution images that PIDVision can process.
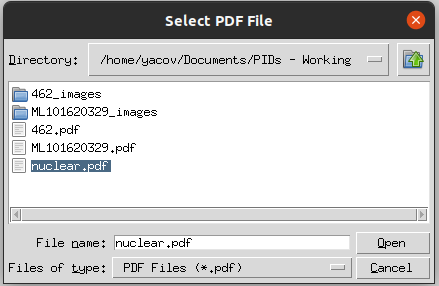
02
Select Your PDF File
A file browser will open. Navigate to your P&ID PDF and click Open. PIDVision supports any standard PDF containing P&ID drawings.
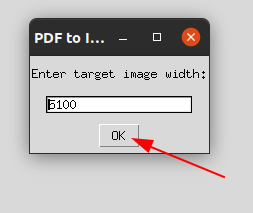
03
Set Target Image Width
Enter the target image width in pixels. A value of 5100 is recommended for high-resolution P&IDs to ensure the AI can detect fine detail. Click OK.
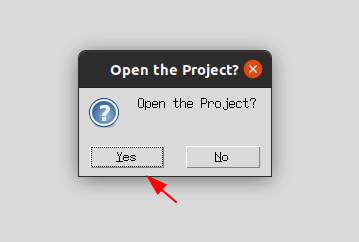
04
Open the New Project
PIDVision will ask if you want to open the newly created project. Click Yes to load the converted images and begin working.
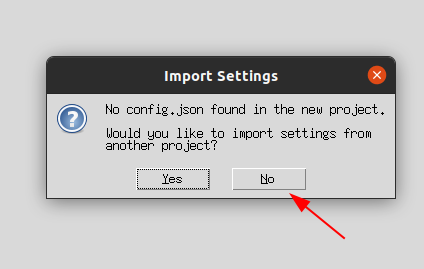
05
Skip Importing Settings (First Time)
Because this is a fresh project, there is no existing config.json.
Click No to start with default settings — you'll configure them in the next steps.
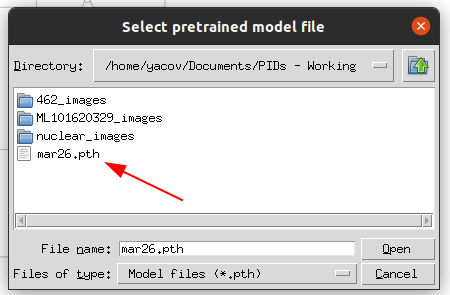
06
Load the Pretrained AI Model
A file browser opens asking you to locate the pretrained model file (.pth).
Navigate to the model file included with your PIDVision download and click Open.
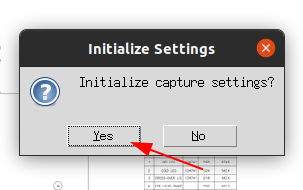
07
Initialize Capture Settings
PIDVision will offer to initialize the capture settings for your project. Click Yes to apply sensible defaults based on your loaded model.
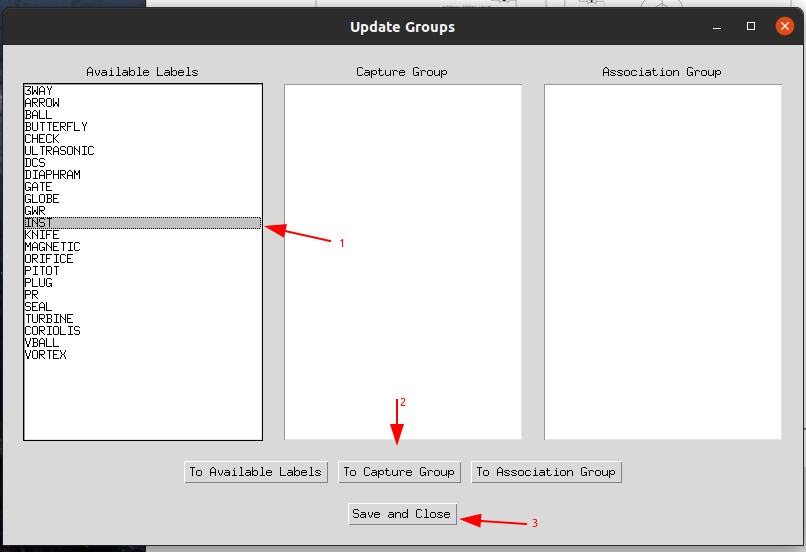
08
Configure Instrument Groups
The Update Groups dialog lets you organize instrument labels into Capture Groups (things to detect) and Association Groups (things to link together). Select labels from the left list and move them to the appropriate group, then click Save and Close.
09
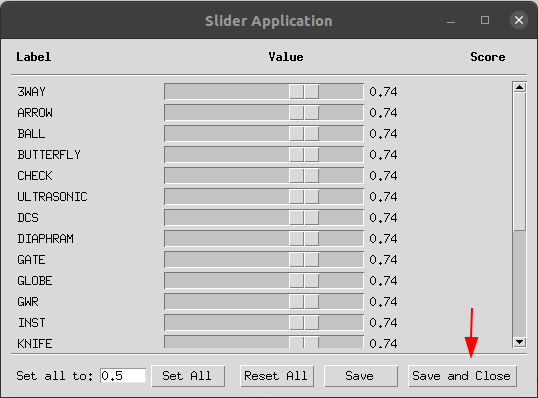
Set Confidence Thresholds
The Slider Application lets you tune the minimum confidence score (0.0 – 1.0) for each instrument label. A default of 0.74 works well for most P&IDs. Click Save and Close when done.
10
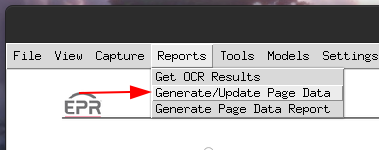
Generate Page Data
In the Reports menu, select Generate/Update Page Data. This triggers the AI detection pass across your P&ID pages.
11
Configure Processing Options
Choose All pages to process the entire document, set your capture region coordinates, and configure overlap detection behaviour. When ready, click Process.

12
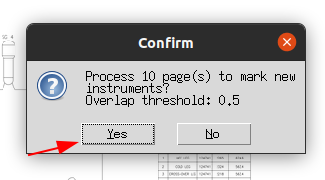
Confirm Processing
A confirmation dialog shows the total number of pages to process and the overlap threshold. Click Yes to start the AI detection run.
13
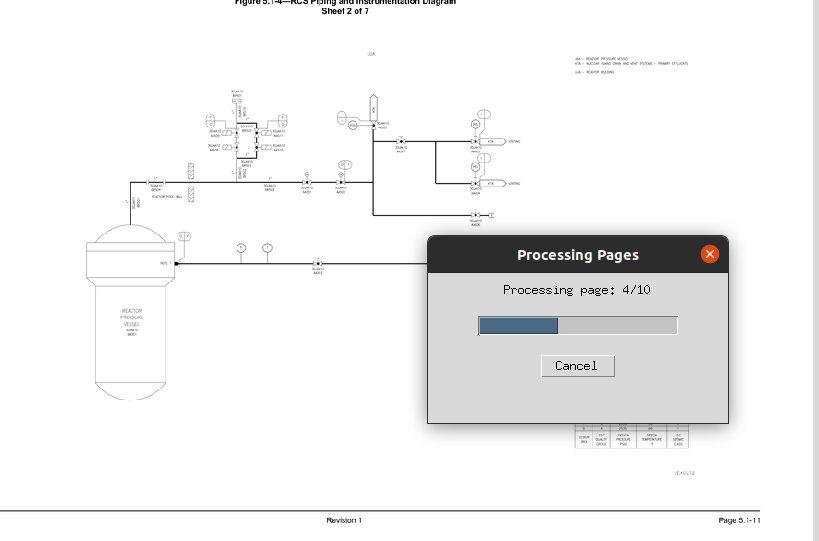
AI Processing in Progress
PIDVision processes each page of your P&ID, running the AI model to detect and classify every instrument. A progress bar shows the current page. Sit back — this is the AI doing the heavy lifting.
14
You're Ready!
Once processing is complete, your P&ID data is ready to review and export. Use the Reports menu to export instrument lists to a spreadsheet (only availible in licensed version), or explore further options under Tools, Models, and Settings to refine your results. The Help menu will give you more information on keybindings and how to use the software.

Ready to get started? Download PIDVision.AI now.
Download PIDVision.AI